Saturday 31 January 2015

Corp Camel Artillery Train Conversion Part One

Not exactly a great leap forward but after consulting someone 'in the know' about matters concerning Uniform I have learned that the Artillery would have been in- direct quote verbatim from the Perry site:

"16. Royal Artillery
This is their probable uniform at El Teb. A Forester’s drawing of the battle of Ginniss depicts them in what looks to be a mix of home service dark blue trousers and either dark blue or khaki frocks. Puttees are either dark blue or khaki."

So. I've decided upon using the existing Camel Corp packs for the sake of simplicity and the following mini's:


Whilst it does mean cleaning up another couple of camels and four figures it is certainly easier than filing away at the Empress Royal Artillery mini's that I had started to think of using and will save on putty time too so I can put aside the hour a day I do for putty use for one or two days! Hurrah! I'm trying to do a little putty work converting mini's for an hour a day with a view of building up to doing full sculpts. I realise that this may be a long way off but if you don't start somewhere, where will you start?

Well, that's the components of the vignette sorted out so the next time you see these mini's 
(assuming I don't have a drastic change of heart about the mini's accompanying the gun) they will be painted up and based.

Bye for now. 


Friday 30 January 2015

Puttee Work- See What I Did? (Taken from Shooting Leave Blog)

Hi,

OK, terrible pun in the title of this post aside..... got me coat and heading out the door as quickly as my legs will carry me! Actually that's a double pun if one thinks about it.......

Very quick update before the KRRC get their black undercoat- I've sculpted the puttees and riding boots in the case of the officer where they were lacking on the backs of the legs of the troopers.

Nothing special, but some quick pics are called for in celebration:


Bye for now.

Looking for 'in scale'Ammunition boxes for Sudan Royal Artillery Camel Train- any idea?

Hi folks,

Just a quickie as I'm pressed for time.  I've got Sick of it All in Newcastle as part of my Birthday do from last week tonight (NYC Hardcore Band- we toured with them in the early 90's). Have to prepare for that- cut hair, pretend balding pate is not there- pretend I'm fitter :>)

OK, I'm looking for some ammunition boxes that I can attach to the sides of the camels, something like the pictures below:


If anyone can think of a source then I 2ould be a very happy man as it will save me having to sculpt them. (I only have my metal sculpting tools at present and a lot of my modelling gear is in my ex girlfriend's garage!).

Here's another pic of what I've got thus far. Mini's are from Perry Miniatures British Camel Corps Command and British Camel Corps,rifles on hips the gun is an excellent resin casting from North Star form their North Star Arsenal which has some great stuff including a Maxim Gun that will be seeing service a later battle that I plan to put on. It is of course Omdurman. but enough of that for now. Let's stick to the Second Battle of El Teb for now!


Also, if anyone has any ideas about what miniatures I could use as troopers, either mounted or dismounted for the vignette then please do speak up as I'm a bit stumped on that one, the only pack thus far is the Perry Miniatures Naval Brigade Command pack below:


There are a couple of miniatures that could be feasibly used but the uniforms are obviously well out. What I really need is some British Royal Artillery chaps walking along with the camels.... again, i don't mind converting (I actually like it!).

Cheers for now.


Thursday 29 January 2015

Conversions- Mounted Kings Royal Rifle Corp and RN Camel Screw Gun Train

I've had a pretty busy day today so I'm pleased with the work that I've got done tonight. Basically I've cleaned up the Perry Mounted Camel Corp troopers which will be used as the Mounted versions of the Kings Royal Rifle Corp for the Second Battle of El Teb. They will be accompanying the 19th and 10th Hussars as part of Rear Admiral Sir William Hewett's Cavalry Brigade in support of the Infantry Square.

I've started with the cavalry for one simple reason, although I love painting horses, they do take up quite a lot of time and as the Cavalry Brigade had been re-mounted on Egyptian Ponies (they suffered the rigours of the Sudan much better than the original British horses). I'm guessing that there wasn't much leeway for finding mounts of a similar colour so the horses will all have to be painted in different colours which adds to the time it will take to paint them up.

I've got to put in an order for the rest of the Cavalry Brigade which I'll be doing very soon. That of course leaves the infantry, rather a lot of them at that (taken from Warlord Games, Blood on the Nile supplement for Black Powder):

1st Infantry Brigade:
Commander: Brigadier General Sir Redvers Buller
3rd Battalion Kings Royal Rifle Corp- 16 mini's.
1st Battalion The Gordon Highlanders- 20 mini's
2nd Battalion Royal Irish Fusiliers-16 mini's

2nd Infantry Brigade:
Commander: Major-General J. Davis
Royal Marines- 16 mini's
1st Battalion The Black Watch- 20 mini's
1st Battalion The York and Lancaster Regiment
Gatling Gun (RN Crew)

So, back to what I was saying, for me it will be easier to get the cavalry/mounted infantry done and dusted first then move on to the infantry who do not require Egyptian Mounts!!  I'll be adding some KRRC on foot in the event they see fit to dismount- that will be in my next order to Perry Miniatures

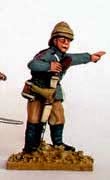
In the pic below you can see the mini's prepped ready for some putty action tomorrow:


As well as the KRRC I've been working on a vignette style 'unit' which will depict a Royal Artillery camel train carrying a 7pdr Screw Gun. Again, I've collected the component parts including a really beautiful resin 7pdr Mountain Gun from North Star (I'll be ordering a few more too as they will be more than useful on the NWF!!), the camels and I'm still deciding whether or not to try to convert some of the royal Perry Miniatures Navy Command pack into troopers assigned to the Camel Train or to go with Mounted Models. Time to sleep on that one methinks.


Cheers for now.

Wednesday 28 January 2015

Beja Base Two Complete.... Another Four to Go!!

..........and that will only be one unit done out of the five that I'm initially aiming at!!

It took a little more time than I had imagined (birthday celebrations getting in the way) but I'm happy to say that the second Beja base has been completed. I'm still messing around with the composition, which one reason the miniatures are only blue-tacked onto the bases, another is that they haven't received their traditional coat of Humbrol gloss followed by the matting down process. I use HMG varnish for matting down. If one was to take the 'old' Dullcote recipe out of the equation then HMG is about the flattest Matt varnish available. I find the 'new' Dullcote recipe to leave a satin sheen which I really do not like one bit. So, HMG Matt varnish comes highly recommended form these quarters!

The second lot were all metal (from the Perry Miniatures Mahdist range) and were very different than their plastic companions to paint. I found them easier to get into for some funny reason and I'm sure that it's not just a case of getting used to the different undercuts etc that are presented by plastics. Perhaps it's just a matter of me getting more used to painting up plastic models. Something that I quite enjoy, they are after all a bit of a different challenge than the metal models.

Here's a few pics of the Beja as they were a few minutes ago on the painting table. The varnishing process will help smooth out any jumps in tonality just as a wash would do.

The Two Bases:


A Couple of Close Ups:


Saturday 24 January 2015

New Remastered Pics of Beja

I finally managed to get Photoshop to run properly on my new laptop so I can now present more 'real' images of the Beja and in particular the skin tones and what I was saying in a previous post about the reds I had added to the first two of the Foundry Musket Brown triads. The last i found needed no red adding as it was certainly red enough!

Without further ado:


Hope you can see the difference a bit of lighting can make!

Cheers for now.


Wednesday 21 January 2015

Interlude; John Jenkins Designs Vignette: General Gordon's Last Stand

I've just noticed this striking vignette on the John Jenkins Designs website featuring the Anglo-Sudanese conflict.

I simply has to include them here as they look so, well, marvelous:

The archetypal depiction of Gorgon's Last Stand


A Close Up of Gordon Pasha's Last Moments


Cheers for now.


Tuesday 20 January 2015

First Base of Beja Complete!

Well, not quite the first base. I've got another six metal Beja which I'm starting to paint up right now that will me mixed and matched with the first and possibly the third plastic base. I find that many of the plastic mini's have a similar stance in that they all seem to be leaning forward a little so it's imperative for me to have more variation in the units, thus adding the metals.

I'm quite pleased with how they're come out given that this was a run through to see how what was possible and that a certain amount of detail had to be added by hand.

I sent for a reddish skin tone on the first unit as the colour of the skin tones in and around the Red Sea Littoral could vary from tribe to tribe (within tribes too one would imagine). I may try a darker tone next time but as I have 30-36 of this batch to do I'll worry about that later! The mini's haven't been varnished as of yet as I prefer to do them in batches of about ten. Saves quite a bit of time.

At present, the miniatures have no concrete spot on the base so I can play around with the composition more when I've got the metals painted up and come up with a more dynamic scene.

Without further ado, here's the 'first' base:


Monday 19 January 2015

Basing Figures; The Sudan

Hi,

I was at the local model shop with the idea of picking up more Plastic Mahdists by Perry Miniatures and as I was browsing around I notices some fine Ballast which, I thought would go rather will on the bases of the mini's for my Sudanese project. It really is quite fine stuff and will mix well and add a bit of contract to the larger sand crystals on each base. I'll be adding rocky bits as well as Silfor static grass (when painted) etc. should make the bases look as interesting as the minatures.


The first couple of bases will be ready very soon so you'll be able to see the results quite soon. The Ansar have taken a little more time to paint than I had expected but I'm feeling my way through the first batch and they should come thick and fast after the initial lot are done.

Cheers for now.


Saturday 17 January 2015

Help Needed!!! Activation of Followers......??????

Now Sorted Out- Many Thanks to Ray!


Hi, it seems that one problem that I wasn't aware of until now, was that my normal Blog Followers wasn't activated. I've been through the widgets list and I cannot find anything that would help me in my quest to turn the damn thing on so that it appears on my webiste.

Can anyone out there give me some advice please- it would be gratefully received.

Darrell.

It's arrived!! BP- Blood on the Nile!! And a Free Fred Burnaby!!

I guess that I've let the goose out of the bag  but here are my first impressions of the book and the Perry Fred Burnaby mini that came free with the order from Perry Miniatures.


Firstly, the book is lavishly illustrated with diorama style pics of beautiful that really capture a glimpse of what some of the action Perry Miniatures with some cameo appearances from Foundry Miniatures, Empress Miniatures (?), Castaway Arts (?) and a few others I spotted that I did not recognise.  As I've said, the photo's are all set up vignette style and give a flavour of the action that's lacking in some rulebooks. Overall, the production quality in on a par with most of Warlord's black Powder, Hail Caesar products but this one seems especially good.


I ordered from the Perry's as I was really taken by the free mini of Fred Burnaby at the Battle of Abu Klea. This miniature is very understated considering the gallant and somewhat futile mess he got himself into during the battle that lead to his untimely demise. I really love this figure and getting an early casting is certainly worthwhile as the quality is always better no matter who you order the miniatures from.

Colonel Frederic Gustavus Burnaby was a very interesting man....  He joined the Royal Horse Guards at a young age and was prone to searching out any reason to go on Shooting Leave, but of a life of adventure. He was a pioneer of ballooning for example as well as travelling through Spain and Russia. His Russian adventures are described in his book, A Ride to Kiva.


In 1879 he began to develop an interest in politics and ran unsuccessfully for Birmingham as a Tory Democrat. He is noted as crossing the English Channel in a hot air balloon (certainly a more successful enterprise than his political career!) and by 1882 was on active service involved in the Egyptian Campaign and later in the Sudan. He fought at the battle of El Teb and acted as political officer to General Valentine Baker. He met his death fighting in a heroic attempt to save his countrymen at Aby Klea. and his loss was much mourned by the army. 

A giant of a man, said to be able to carry two troopers under each arm(!), he was larger than life when he lived and goes down as a living legend in his time.


I'll talk much more comprehensively about Fred Burnaby in a later post.

Cheers for now.

Tuesday 13 January 2015

Second Afghan War Mounted Officer Conversion

Inspired by a mini that I was sent to paint I was drawn into having a go at adding a poshteen to this Mounted Officer. The mini itself is a Studio Miniatures sculpt (I believe by Soapy??) and the castings are a crisp as you like. I highly recommend their range for the Second Afghan War especially their Afghans which as well as being beautifully sculpted and cast are really dynamic sculpts. I think Soapy has recreated some of his magic that was the Woodbine Designs WWI in the East range that he did for Gripping Beast.

The poshteen as you can see was sculpted using Pro-Create putty (Greystuff in my world) which I find is much easier to manipulate than Greenstuff as it lacks the tackiness of Greenstuff but retains the adhesive properties. I know statement sort of doesn't make that much sense but if you haven't used it, buy some and you'll see what I mean.

I was without my Clayshapers which I normally use when sculpting. They allow you to manipulate the putty but without the hard lines and messiness that general metal sculpting tools can cause. So, as a result, it's certainly not my best but I reckon that it's OK and should paint up very well. If I have one criticism (apart from some hard lines left by the metal tools) is that I think I've sculpted a little too much sheep skin but I'm now saying to myself that an Officer in Her Majesties Army could afford the extra wool :>)

Anyway, without further ado, here are the images:


Cheers for now.


Monday 12 January 2015

Perry Miniatures Plastic and Metal Beja Comparison

As promised (how very unlike me!) here are a few comparison shots of the Perry Beja in Metal and in Plastic. I've left the metal one's without an undercoat for now so it's obvious which mini's are which.First, before any discussion here are the comparison shots:


The first thing that struck me is that the metals are slighter than the plastics, not by much but it is noticeable. Not by all that much and with a lick of paint I don't really see that the size difference will be obvious without really scrutinizing the miniatures. What i am looking to do is get as much variety in the units as possible so with the addition of the 12 or so packs of metals this should be a very achievable aim.

So, how does the detail on the metals compare with the plastics? Generally the metal miniatures have more character and are in more dynamic poses too. The character of the metals is however offset not just by the cost of the plastics but the conversion possibilities they present. I'm really looking forward to hacking a few of the plastics up and creating some casualties as well as a series of vignettes that i have planned. This of course all be published and discussed in detail in future posts. For now it's a matter of getting used to the plastic mini's before embarking on any chopping! I find that if you give yourself a chance to get 'used to' plastics then you get a much better feel for conversion possibilities and perhaps more importantly, what will look right.

OK, it's late so that's it for now.

Cheers.

Sunday 11 January 2015

Project Sudan is Underway!!

Firstly, please forgive the quality of the pics in this little article. Due to circumstances beyond my control I haven't got my lighting system and I've just switched from my Laptop to a Lenovo Yoga and frankly the software for pics compared to what I normally use (Photoshop) is complete rubbish. I've got a CRR/WR on it's merry way to me but as it hasn't arrived as of yet I'm having to make do. I'll re-process the pics as soon as I can install Photoshop! These pics are a bit dark and likely to be very large when you click on them, as I say, circumstances beyond my control.

The Sudan project is under way!!

It's been a while as I've had quite a few personal problems (still have!) since my last post but I'm beginning to get back into the hobby again so that in itself deserves a big "Hurrah!!"

I've manages to glue myself together the first 13 Beja (or Hadendawa in this case) and I'm quite pleased with the results. They were very easy to assemble, which counts for a lot when one has to assemble a mighty host; I've got three boxes to do in total! I'm going to do half as Beja and Half as Kordofani Tribesmen as I want the Beja to be as naked in terms of their clothing and the Kordonfani Tribesmen to be more fully clothed. I'll be mixing in a lot of metals on the bases too to keep as much variation going as possible. There are likely to be a few conversions as well but at this stage, lacking all my gear (I think I've got some Grey Stuff somewhere??) I'm going to stick to just well, sticking them together. I always find that this gives a greater 'feel' to how they can be varied so it's not such a bad thing to wait a short while anyway.

Tonight I'll take some shots of the plastics next to the metals as I'm sure that the former are slightly bulkier than the latter. Anyway, it will give me an idea of how to best fit them all in together in a particular unit. It might very well be the case that the metals have lower and less bulky bases in which case adding a piece of card/platicard below the bases of the metals will do the trick nicely.

For now,here are the pics of the plastics glued together:


So, until tomorrow and the comparison shots between the plastics and the metals, it's cheers for now.